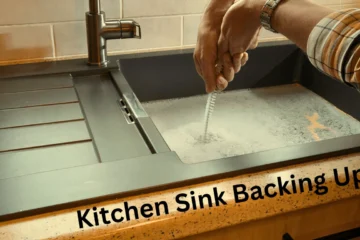
The kitchen is often called the heart of the home, but even the most cared-for spaces can harbor unwelcome guests like mold. Wondering how to remove mold sling from kitchen sink? Mold growth in and around your sink isn’t just unsightly—it can pose health risks and create unpleasant odors. The good news? With the right methods, cleaning tools, and a little know-how, you can tackle this grimy problem head-on and restore your kitchen’s cleanliness.
This article walks you through how to remove mold from your kitchen sink, from identifying the issue to getting rid of it effectively and preventing it from returning.
Table of Contents
Why Does Mold Grow in Your Kitchen Sink?
Before we jump into mold removal techniques, it’s helpful to understand why your kitchen sink is a magnet for mold. Mold thrives in damp, warm environments where organic matter (like food particles or grease) is present. When you think about it, the kitchen sink checks all those boxes:
- Moisture: Mold loves damp spaces, whether leftover water or condensation.
- Food Debris: Tiny bits of food from washing dishes or scrubbing cookware can feed mold.
- Dark Spots: Areas like sink drains, under the sink, or behind a faucet stay darker for longer, creating a perfect breeding ground.
- Poor Ventilation: High humidity tends to linger without proper airflow, increasing mold risk.
Understanding these causes helps ensure you can address the root of the problem, not just the surface symptoms.
Identify Mold in Your Kitchen Sink
Mold isn’t always obvious at first glance. While black mold is the most noticeable (thanks to its dark and sometimes slimy appearance), other colors you might spot include green, white, or even orange.
Look for mold:
- Around the edges of the sink
- Beneath the sink basin (check under your cabinet regularly)
- Along caulking or grout lines
- Inside the drain or garbage disposal system
If you notice any dark streaks, fuzzy patches, or a musty, earthy odor in these areas, you’re likely dealing with a mold issue.
Tools for Mold Removal
Before getting down to business, gather the following cleaning essentials:
- Rubber gloves
- A face mask or respirator
- Scrubbing brush or old toothbrush
- Microfiber cloth or sponge
- Baking soda
- White vinegar
- Dish soap
- Bleach (optional for stubborn mold)
- Bucket or spray bottle
- A flashlight (to illuminate hard-to-see spots, like pipes)
Light mold infestations can be handled by everyday household items like vinegar and baking soda. However, a stronger cleaning solution might be needed for tougher cases.

How to remove mold sling from kitchen sink
1. Protect Yourself Before Starting
Mold spores can irritate your skin, eyes, or lungs if inhaled. To stay safe, wear rubber gloves, a mask, and protective clothing. Open windows or turn on a fan for better ventilation during cleaning, especially if using bleach.
2. Clear Out the Area
Remove any dishes, utensils, or clutter from the sink. If mold is under the sink, remove any stored items to fully access the moldy surfaces.
3. Clean the Surface Mold
Begin by using dish soap and warm water to remove visible grime and loosen dirt, grease, or food particles. Scrub areas like the sink basin, faucet, and drain edges where mold can be seen.
A scrubbing brush works well here, but an old toothbrush offers precision for tight spots.
4. Use Baking Soda and Vinegar
Make a cleaning paste with baking soda and water for natural and chemical-free mold removal. Apply the paste to moldy areas and allow it to sit for 15 minutes. This gentle abrasive helps lift stains and works as a deodorizer.
Then, pour white vinegar directly onto the baking soda paste. You’ll notice fizzing, which means the solution breaks down the mold and grime. Scrub again to loosen any remaining residue, and rinse thoroughly with warm water.
5. Attack Stubborn Mold with Bleach
A bleach solution might be necessary for persistent mold issues. Mix 1 part bleach to 10 parts water in a spray bottle or bucket. Apply it to the moldy areas, wait 5-10 minutes, and scrub. Make sure to rinse completely, as bleach can leave damaging residue if it lingers on surfaces.
Pro tip: Don’t mix bleach with other cleaning agents (especially ammonia), as it can produce harmful fumes.
6. Disinfect the Drain
Mold may be lurking inside your sink drain or garbage disposal. Pour a cup of baking soda, followed by a cup of white vinegar, into the drain. Allow it to fizz for 5-10 minutes, then rinse with boiling water. For extra cleaning power, you can use a small drain brush or pipe cleaner to scrub the inside walls of the drain.
7. Wipe Down and Dry the Area
After scrubbing and rinsing, wipe the sink, faucet, and surrounding areas with a clean microfiber cloth. Ensure the area dries completely to prevent moisture from feeding mold regrowth.
8. Check Underneath
Inspect the cabinet beneath your sink for water damage, leaky pipes, or hidden mold patches. Use the vinegar or bleach solution (depending on the severity) to clean and disinfect these areas.
Preventing Mold Growth in Your Kitchen Sink
Removing mold is only half the battle. To keep your kitchen sink mold-free, adopt these preventative measures:
1. Keep the Sink Dry
Wipe down your sink after each use. A simple pass with a dry cloth can remove excess moisture, making it harder for mold to grow.
2. Clean Regularly
Make a habit of cleaning your sink and drains weekly. To maintain a fresh, mold-resistant surface, use a combination of dish soap and vinegar/baking soda.
3. Fix Leaks Promptly
Leaky faucets or pipes waste water and create the perfect conditions for mold. Check and fix any leaks as soon as you notice them.
READ MORE: Why kitchen sink leaking from top?
4. Improve ventilation
Ensure your kitchen has proper airflow. Turn on exhaust fans while cooking or use a dehumidifier if your home is particularly humid.
5. Re-Caulk Seals
Old, cracking caulking around your sink or countertops can trap water and lead to mold. Re-caulking those areas with a mold-resistant product will protect your kitchen in the long run.
6. Use Mold-Resistant Products
Mold-resistant sink liners or drain covers are widely available and can help reduce mold risks. You can also look for cleaning products specifically designed to deter mold growth.
The Importance of Regular Maintenance
While mold spores will always be present in the air, they only become problematic when they settle in a moist, nutrient-rich environment like your sink. With consistent cleaning and attention to moisture control, you can stop mold from taking root.
Regular sink maintenance isn’t just about aesthetics—it’s about keeping your kitchen a safe, healthy place to prepare food. By staying proactive with the tips outlined above, you’ll save yourself the stress of dealing with stubborn mold in the future.
Conclusion:
Removing mold from a kitchen sink doesn’t have to be overwhelming. By breaking the process into clear, manageable steps and using the right tools, you’ll get your sink back to its sparkling best in no time. Even better, with a bit of ongoing care—like drying the sink and fixing leaks—you can prevent mold from making an unwelcome return.
Your kitchen deserves a clean, comfortable space free of mold and mildew. With the methods shared here, you’re fully equipped to tackle mold removal and enjoy a healthier home environment.


